3. Booting a Jetstream Computer Instance for your use!
What we’re going to do here is walk through starting up a running computer (an “instance”) on the Jetstream service.
- Jetstream is run by NSF and provides elastic cloud computing services.
- “Cloud” computing is a fancy word for being allowed to temporarily use someone else’s computer somewhere else with full administrative privaleges to install whatever software we want.
- Sometimes we need to use computing resources that are larger than our personal computers. Cloud computing lets us decide how much capacity we want to be using.
If you would like to read more about cloud computing, see this Carpentry Cloud Computing lesson.
Below, we’ve provided screenshots of the whole process. You can click on them to zoom in a bit. The important areas to fill in are circled in red or pointed out with arrows.
Some of the details may vary – for example, if you have your own XSEDE account, you may want to log in with that – and the name of the operating system or “Image” may also vary from “Ubuntu 18.04” or “DIBSI 2018” depending on the workshop.
First, go to the Jetstream application at https://use.jetstream-cloud.org/application.
Now:
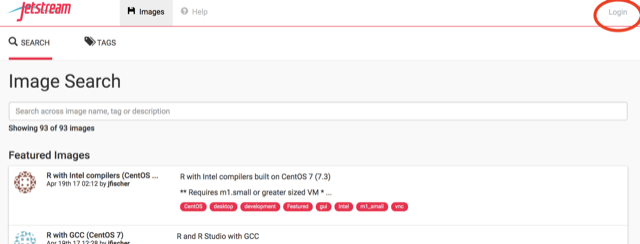 login
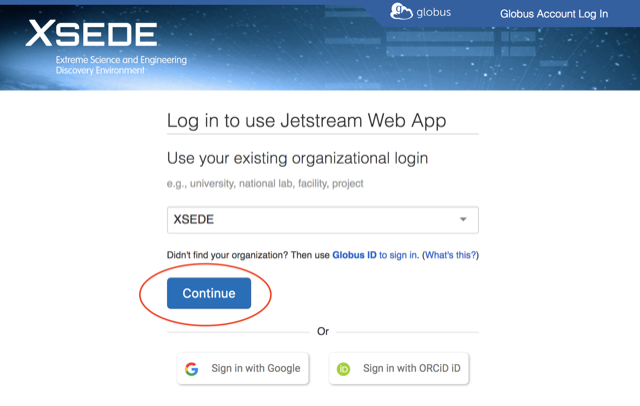
login3.2. Use “XSEDE”
Choose “XSEDE” as your account provider (it should be the default) and click on “Continue”.
 foo
foo
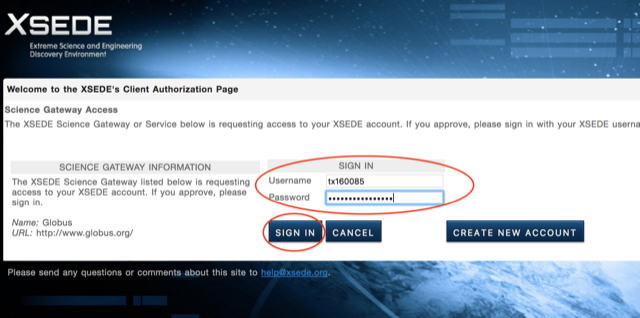
3.3. Fill in the username and password and click “Sign in”
Fill in the username and then the password (which we will tell you in class).
 foo
foo
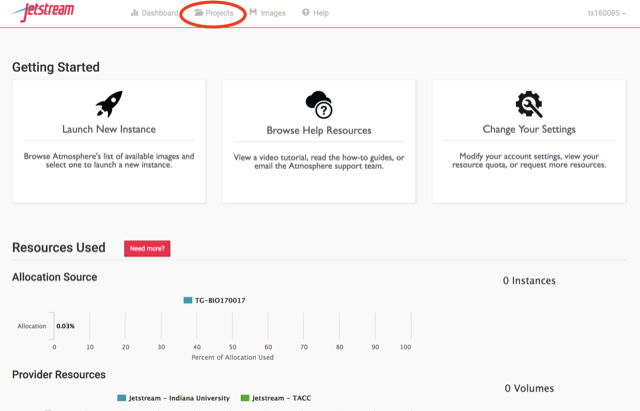
3.4. Select Projects and “Create New Project”
Now, this is something you only need to once if you have your own account - but if you’re using a shared account like tx160085, you will need a way to keep your computers separate from everyone else’s.
We’ll do this with Projects, which give you a bit of a workspace in which to keep things that belong to “you”.
Click on “Projects” up along the top.
 foo
foo
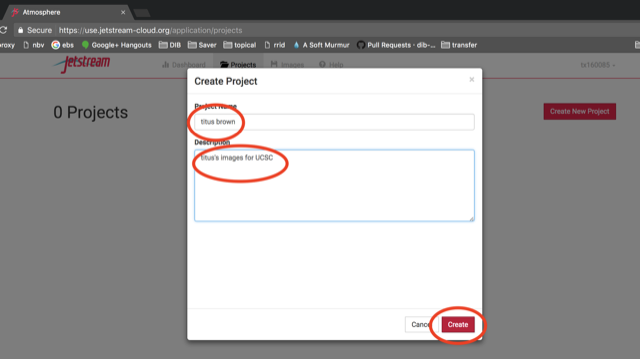
3.5. Name the project for yourself, click “create”
Enter your name into the Project Name, and something simple like “ANGUS” into the description. Then click ‘create’.
 foo
foo
 foo
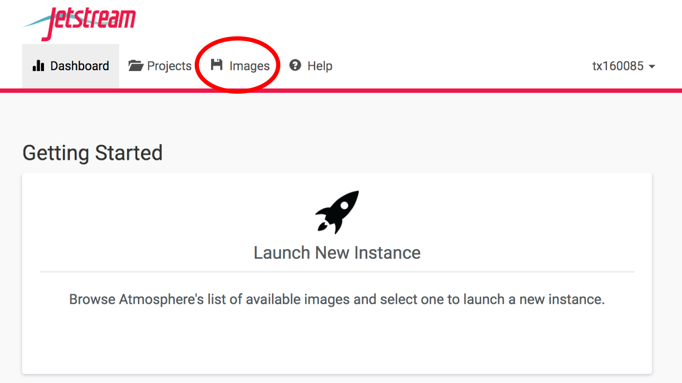
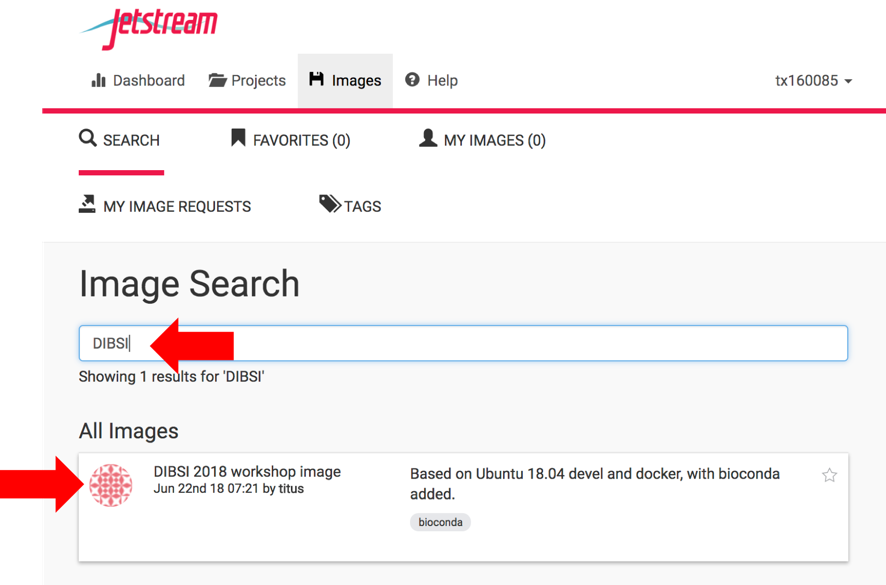
foo3.7. Find the “DIBSI 2018 workshop image” image, click on it
Enter “DIBSI” into the search bar - make sure it’s from June 22nd, 2018 by Titus. This images is based on Ubuntu 18.04 devel and docker, with Rstudio and bioconda package manager added.
Here, “image” refers to the resources that are pre-loaded into your computing workspace on your instance. Think of it like apps that come with your phone before you add new ones on your own. Loading the DIBSI image Titus built before the workshop prevents us from having to choose our operating distrubution and download frequently-used packages on our own, and makes sure that everyone at ANGUS has the same basic computing environment. That ensures that the commands we tell you to use will work, and makes it easier for TAs to figure out what’s wrong if you run into error messages.
 foo
foo
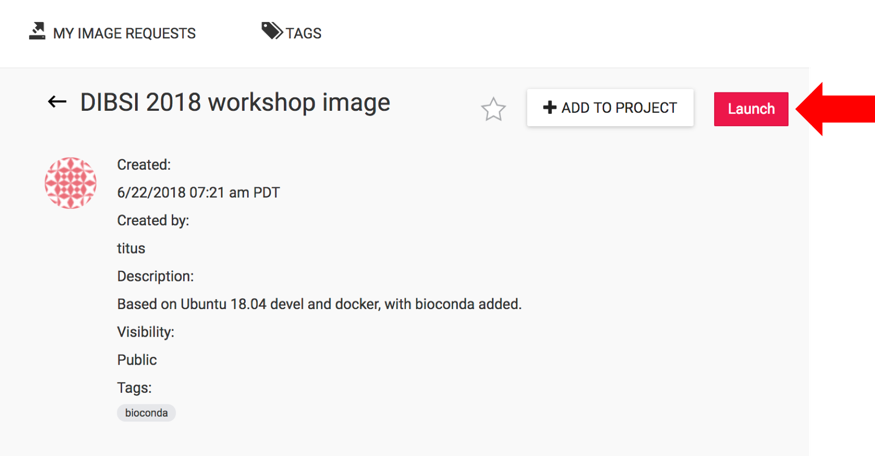
Launch
 foo
foo
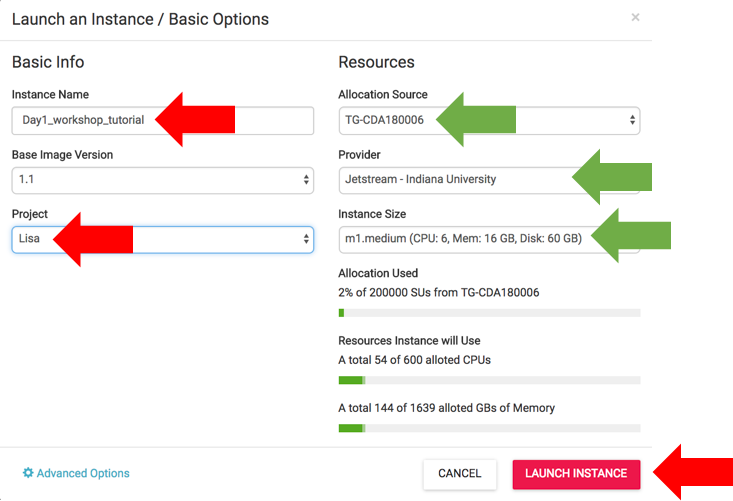
3.8. Name it something simple
Change the name after what we’re doing - “Day1_workshop_tutorial”, for example, but it doesn’t matter. Pull down the drop-down menu under ‘Project’ to select your name. Then make sure the appropriate Resources are selected. You probably won’t have to change these. The ‘Allocation Source’ will already be selected. (This is our XSEDE allocation grant ID.) The ‘m1.medium’ instance size will already be chosen. This is the minimum instance size. A larger instance can be selected, depending on what we will be doing. The ‘Provider’ will be randomly chosen as either ‘Jetstream - Indiana University’ or ‘Jetstream - TACC’.
 foo
foo
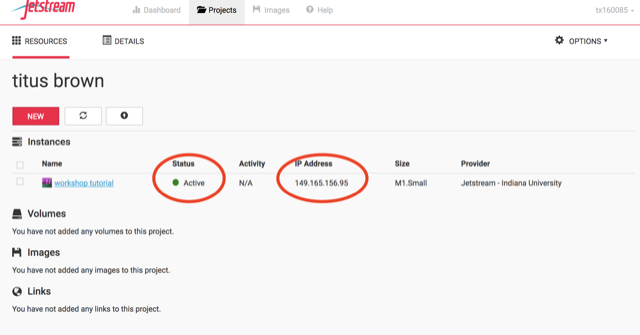
3.9. Wait for it to become active
It will now be booting up! This will take 2-15 minutes, depending. Just wait! Don’t reload or anything. When it is ready, the colored dot under “Status” will turn green and look like this:
 foo
foo
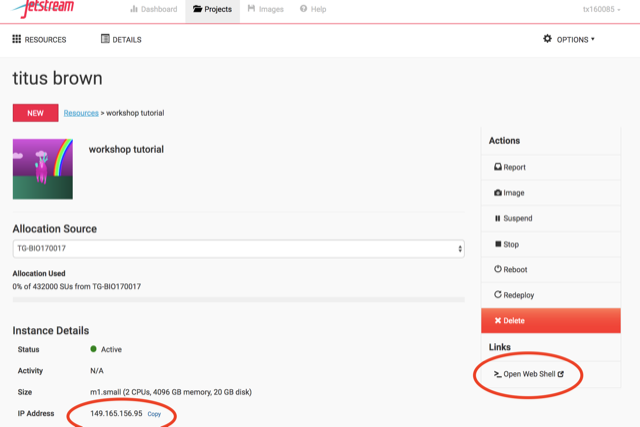
3.10. Click on your new instance to get more information!
Now, you can login to the instance! Note that you’ll need to use the private key
file located in the #general channel in slack. The username will be specific to your classroom, e.g. dibbears, diblions or dibtiger. Use these log-in instructions for using a private-key.
If you cannot access the terminal using the private key, a web shell is available:
 foo
foo
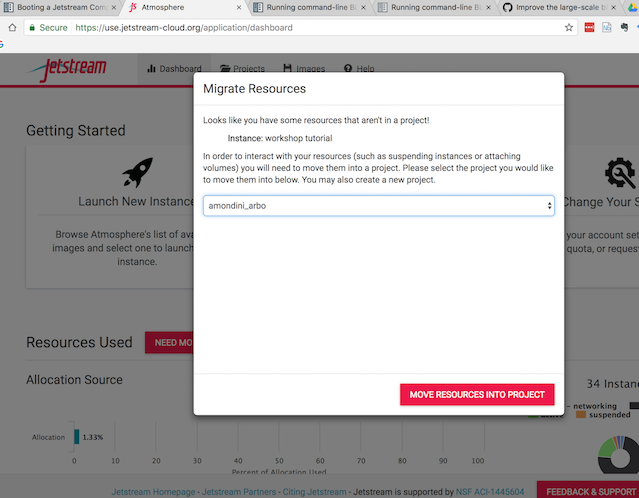
3.11. Miscellany
There’s a possibility that you’ll be confronted with this when you log in to jetstream:
 foo
foo
A refresh of the page should get you past it. Please try not to actually move any instances to a new project; it’s probably someone else’s and it could confuse them :)
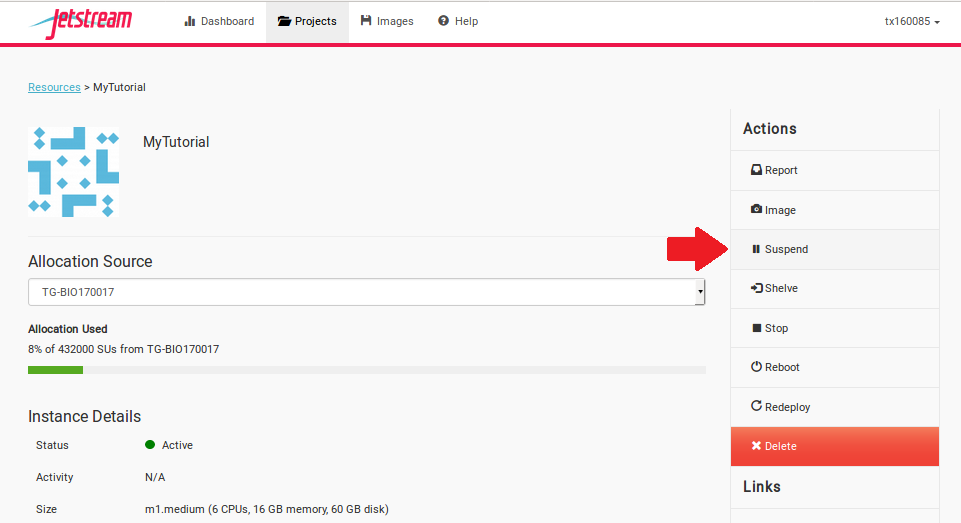
3.12. Suspend your instance
You can save your workspace so you can return to your instance at a later time without losing any of your files or information stored in memory, similiar to putting your physical computer to sleep. At the Instance Details screen, select the “Suspend” button.
 foo
foo
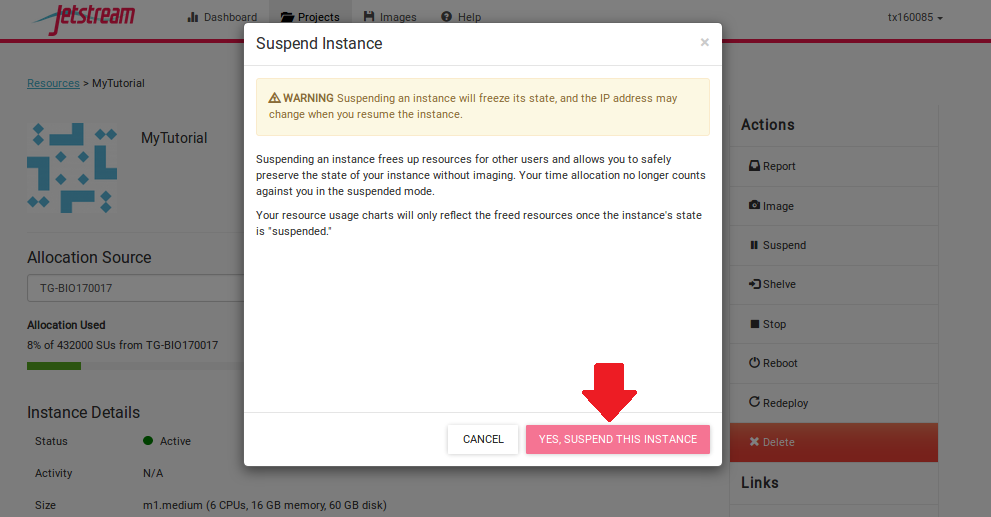
This will open up a dialogue window. Select the “Yes, suspend this instance” button.
 foo
foo
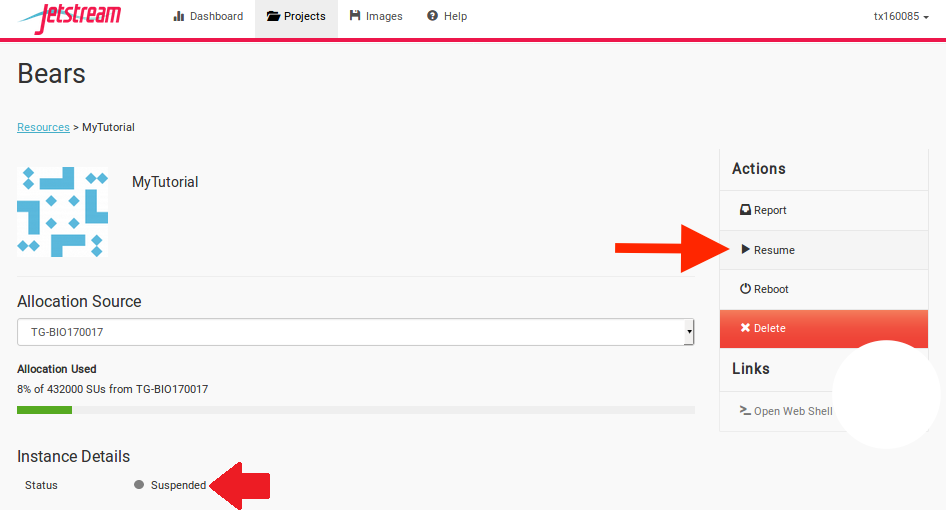
It may take Jetstream a few minutes to process, so wait until the progress bar says “Suspended.”
3.12.1. Resuming your instance
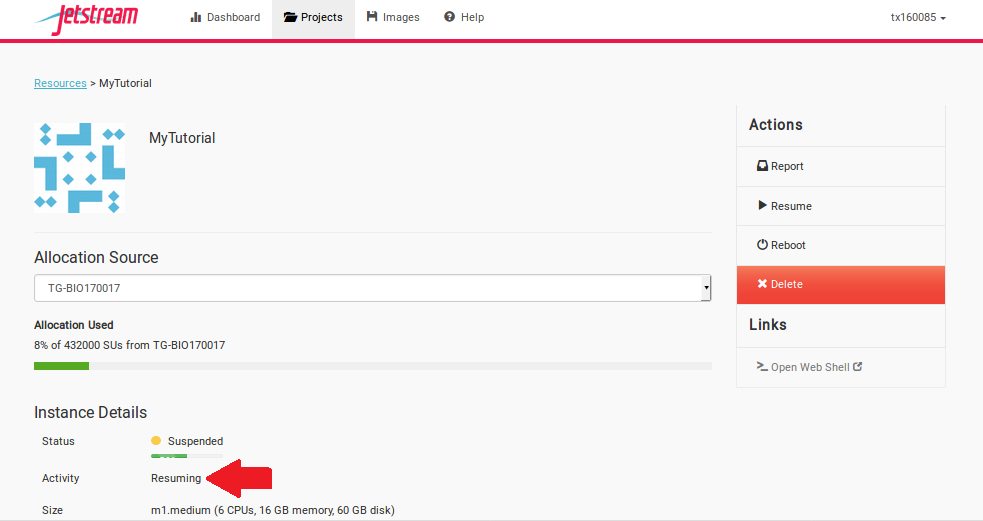
To wake-up your instance, select the “Resume” button.
 foo
foo
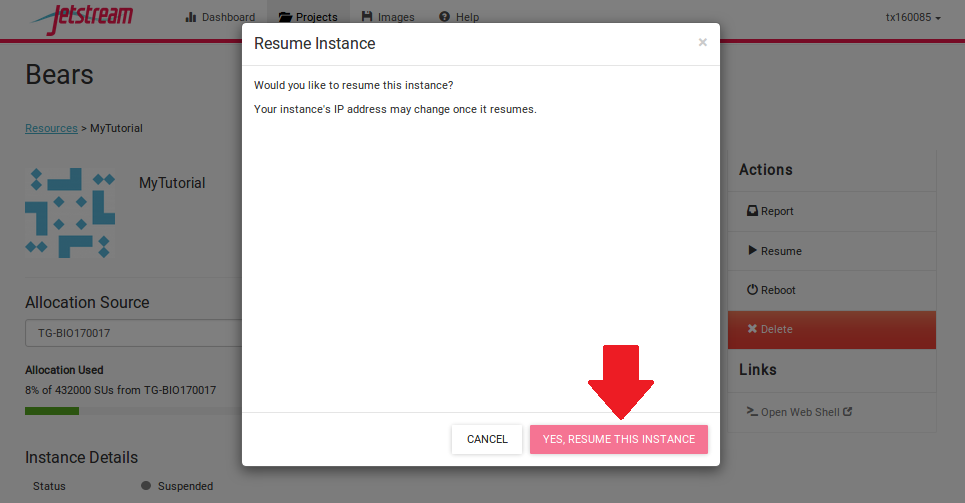
This will open up a dialogue window. Select the “Yes, resume this instance” button.
 foo
foo
It may take Jetstream a few minutes to process, so wait until the progress bar says “Active.”
 foo
foo
3.13. Shutting down your instance
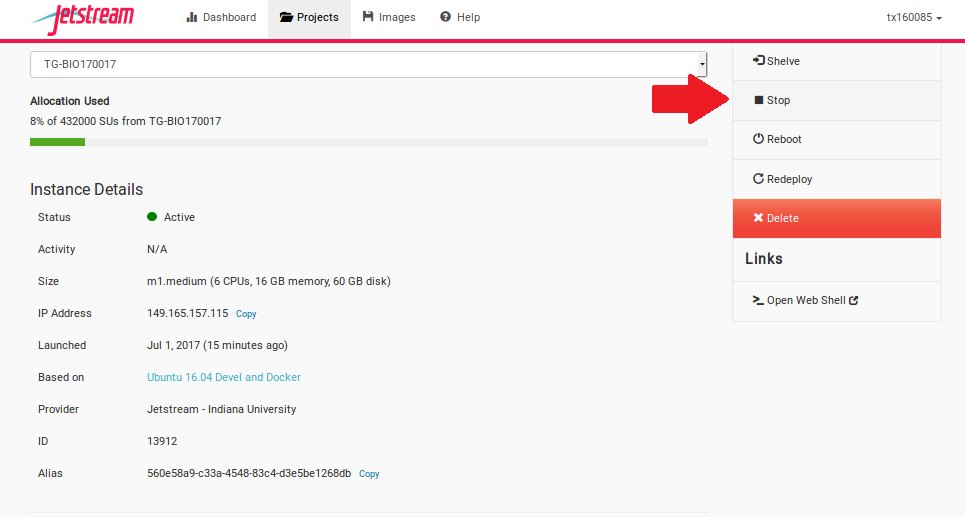
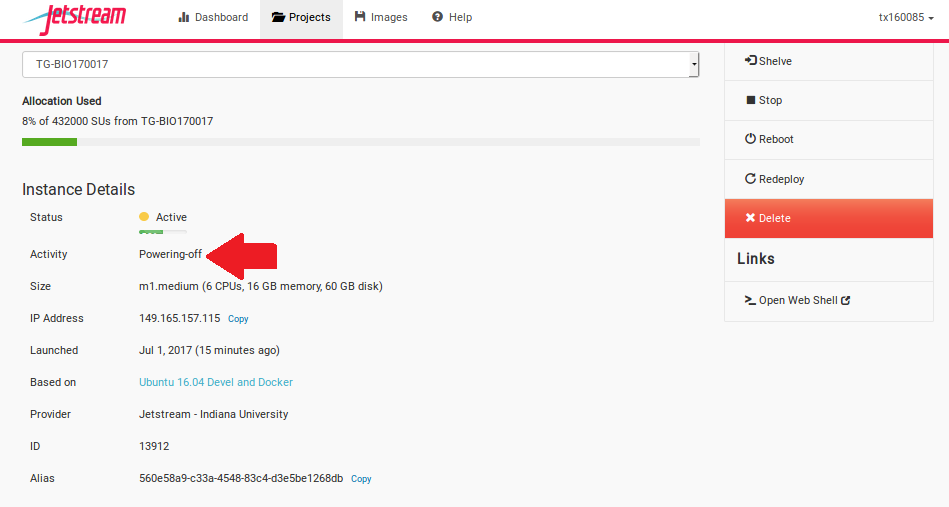
You can shut down your workspace so you can return to your instance another day without losing any of your files, similiar to shutting down your physical computer. You will retain your files, but you will lose any information stored in memory, such as your history on the command line. At the Instance Details screen, select the “Stop” button.
 foo
foo
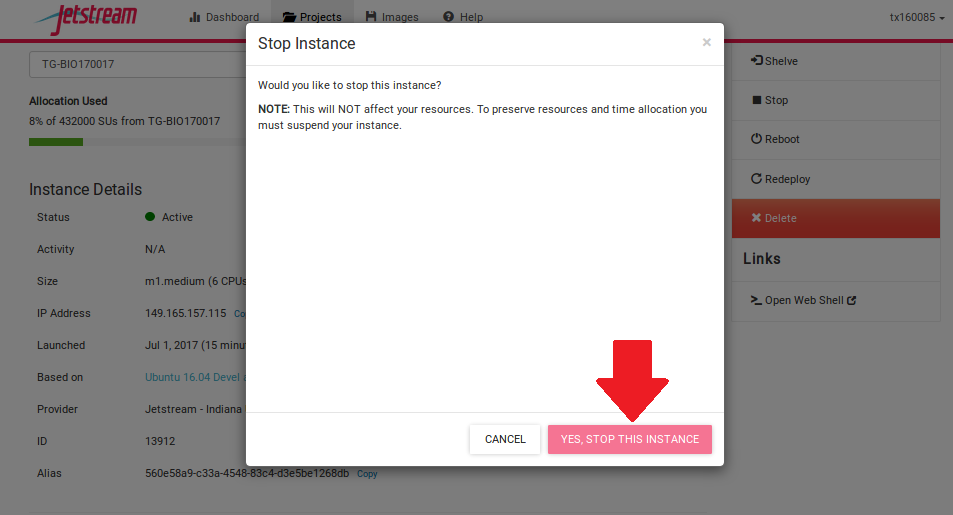
This will open up a dialogue window. Select the “Yes, stop this instance” button.
 foo
foo
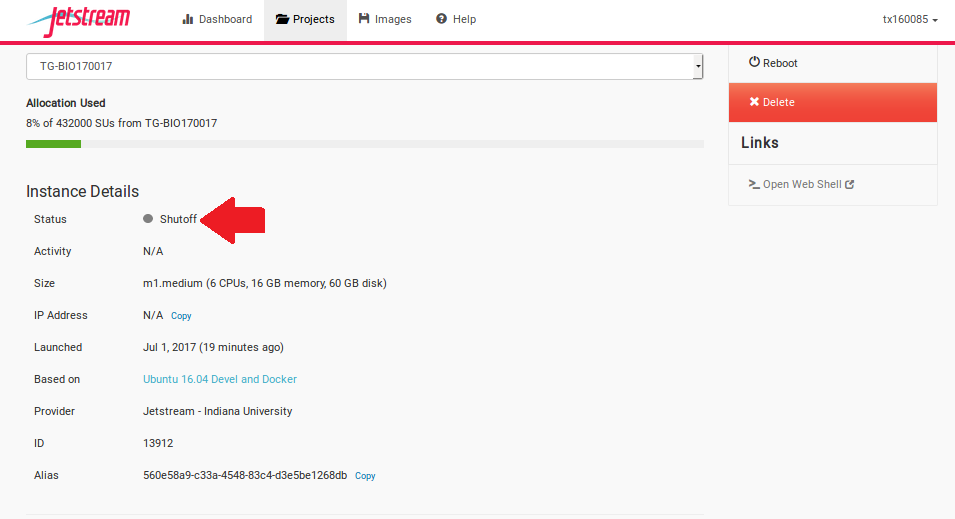
It may take Jetstream a few minutes to process, so wait until the progress bar says “Shutoff.”
 foo
foo
 foo
foo
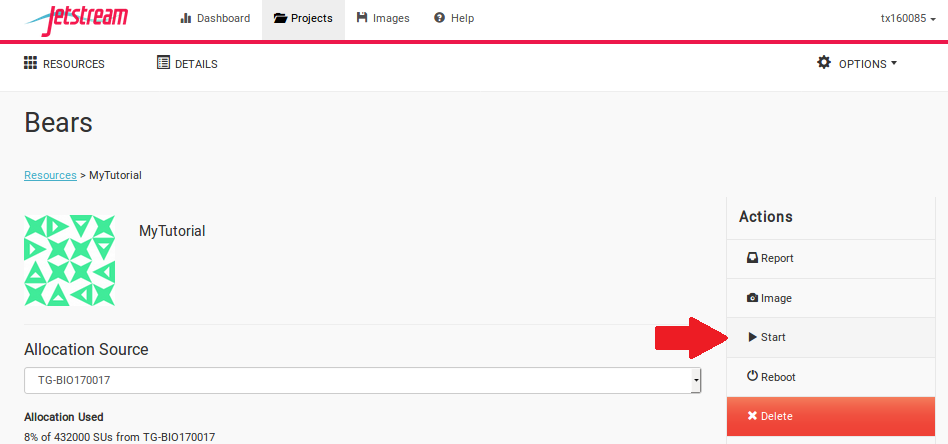
3.13.1. Restarting your instance
To start your instance again, select the “Start” button.
 foo
foo
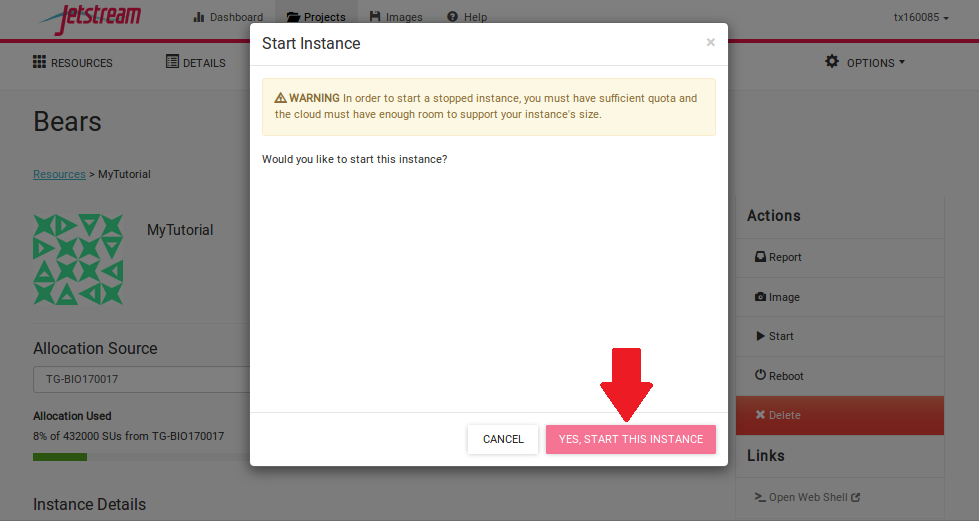
This will open up a dialogue window. Select the “Yes, start this instance” button.
 foo
foo
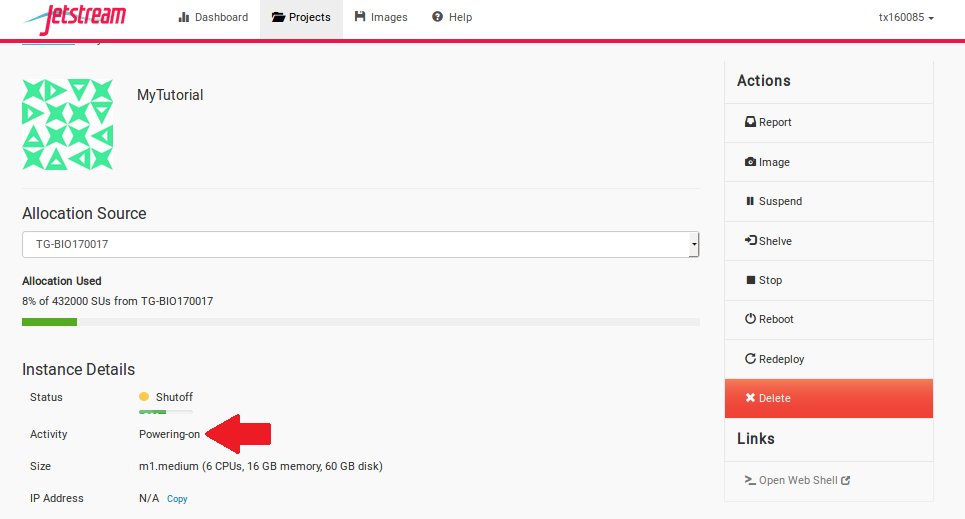
It may take Jetstream a few minutes to process, so wait until the progress bar says “Active.”
 foo
foo
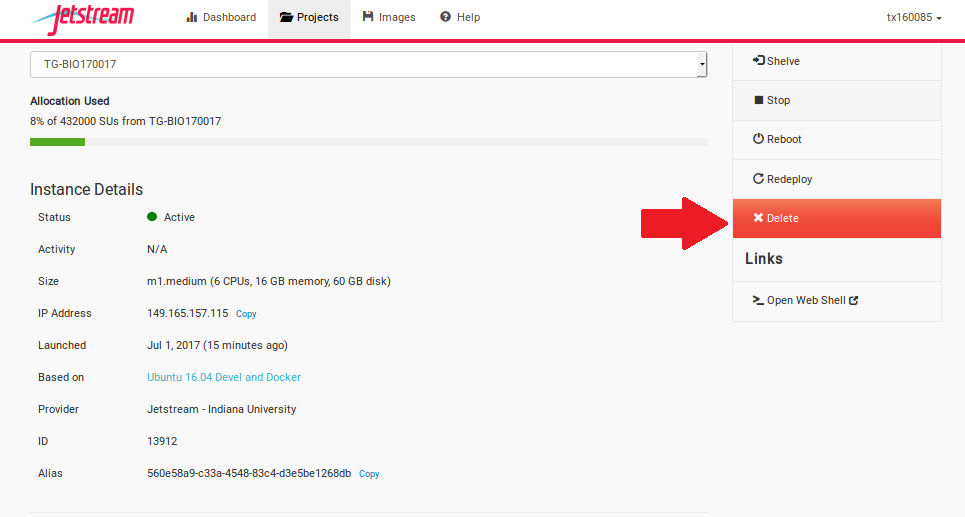
3.14. Deleting your instance
To completely remove your instance, you can select the “delete” buttom from the instance details page.
 foo
foo
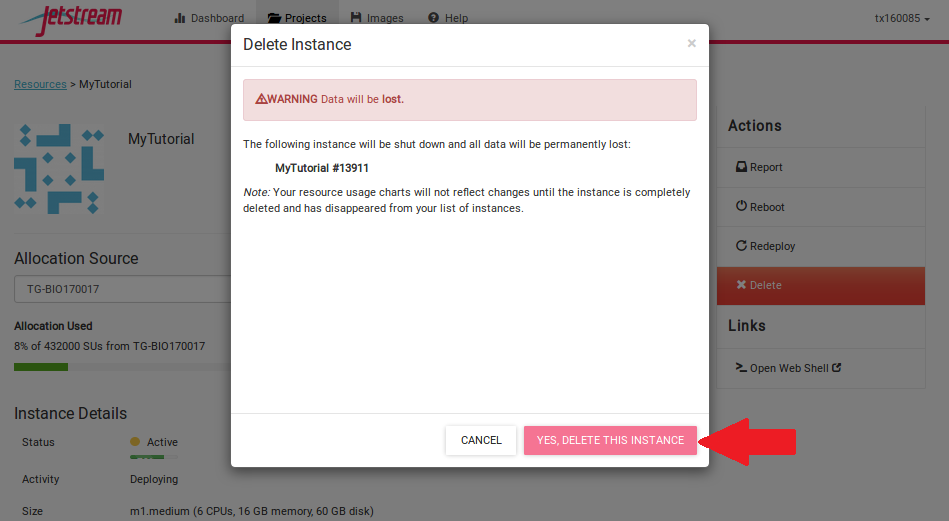
This will open up a dialogue window. Select the “Yes, delete this instance” button.
 foo
foo
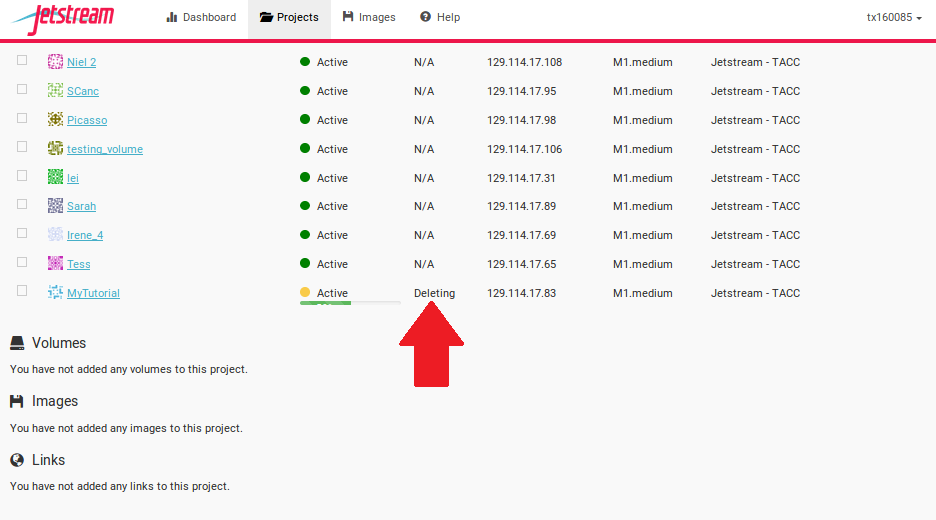
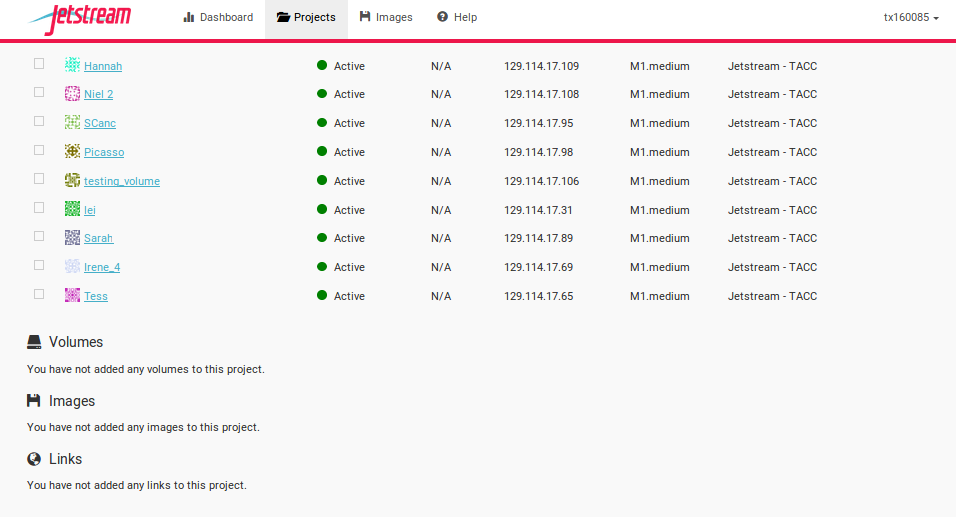
It may take Jetstream a few minutes to process your request. The instance should disappear from the project when it has been successfully deleted.
 foo
foo
 foo
foo