Start up an EC2 instance
Go to ‘https://aws.amazon.com‘ in a Web browser.
Select ‘My Account/Console’ menu option ‘AWS Management Console.”
Log in with your username & password.
Click on EC2 (upper left).
Select “Launch Instance” (midway down the page), and select “Quick Launch Wizard”.
The launch wizard
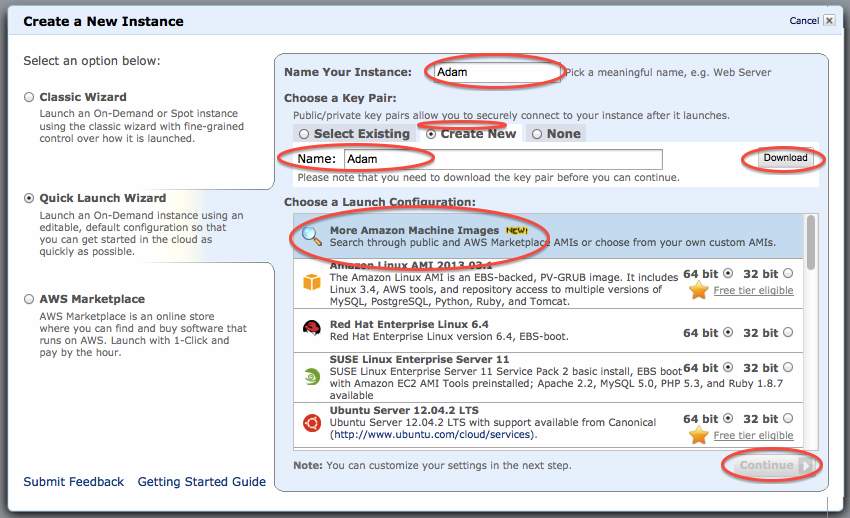
On this page,
- Name your new computer something (here, “Adam”; name it after yourself instead).
- Create a new key pair (here, “Adam”; name it after yourself instead) and Download it.
- Select “More Amazon machine images.”
- Click on “Continue.” This will be greyed out until you download the key pair (button, upper right).
Note: You only need to create a new key pair the first time you’re doing this – you can select the one you created the first time, if you still have a copy of the key file you downloaded stored somewhere.
“Create a new instance” page 1
Enter ‘ami-c17ec8a8’ into the search box and click “search”. Select it, and hit Continue.
(If it doesn’t show up, exit the wizard and make sure you’re in US East zone – see upper right of EC2 console.)
“Create a new instance” page 2
On this page, “Edit details” until it looks like the below image –
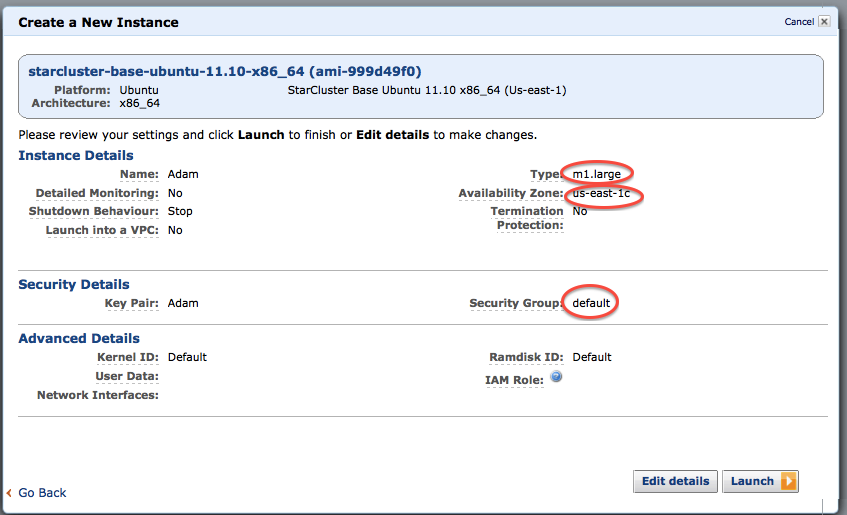
- Make sure your “Type” is m1.large.
- Make sure your “Availability zone” is something specific, like us-east-1c.
- Make sure your “Security group” is set to default.
Then, click “Launch”.
Wait for your instance to be running
Go to the ‘instances’ list and make sure your particular instance is running.
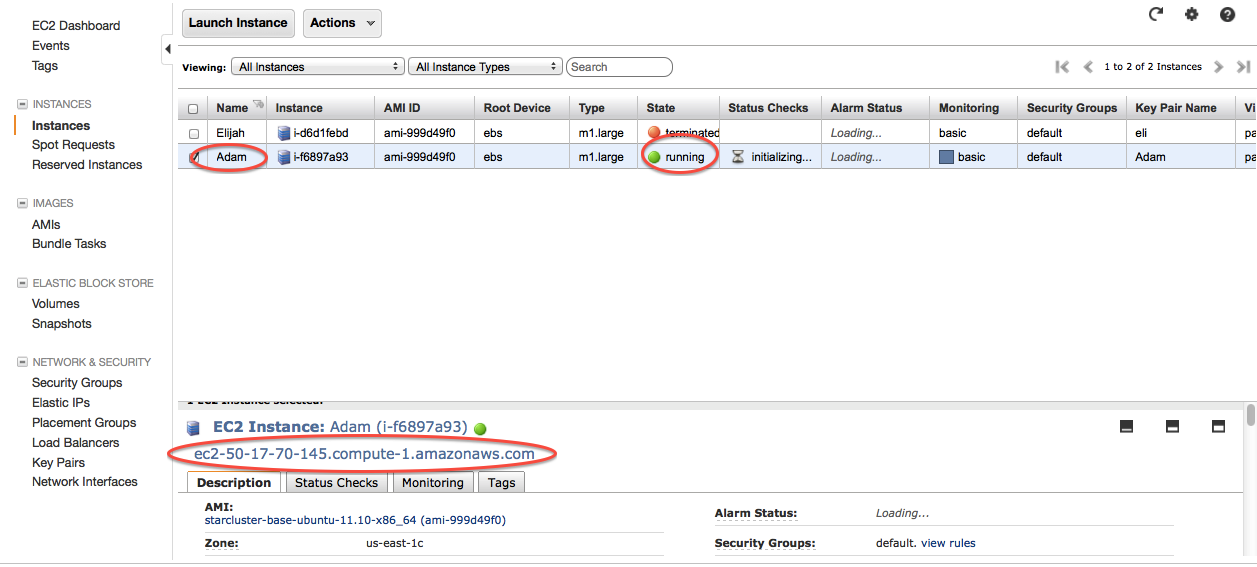
You’ll need the hostname of your new computer, on the bottom (ec2-...) – we suggest selecting this and copying it somewhere.
Then, go to Logging into your new instance “in the cloud” (Windows version) or Logging into your new instance “in the cloud” (Mac version)