8. Environment management with Conda
8.1. Learning objectives
Why should I use a package and environment management system as part of my research workflow?
What is Conda? Why use Conda?
Manage Conda environments
Conda channels & packages
8.2. Why should I use a package and environment management system?
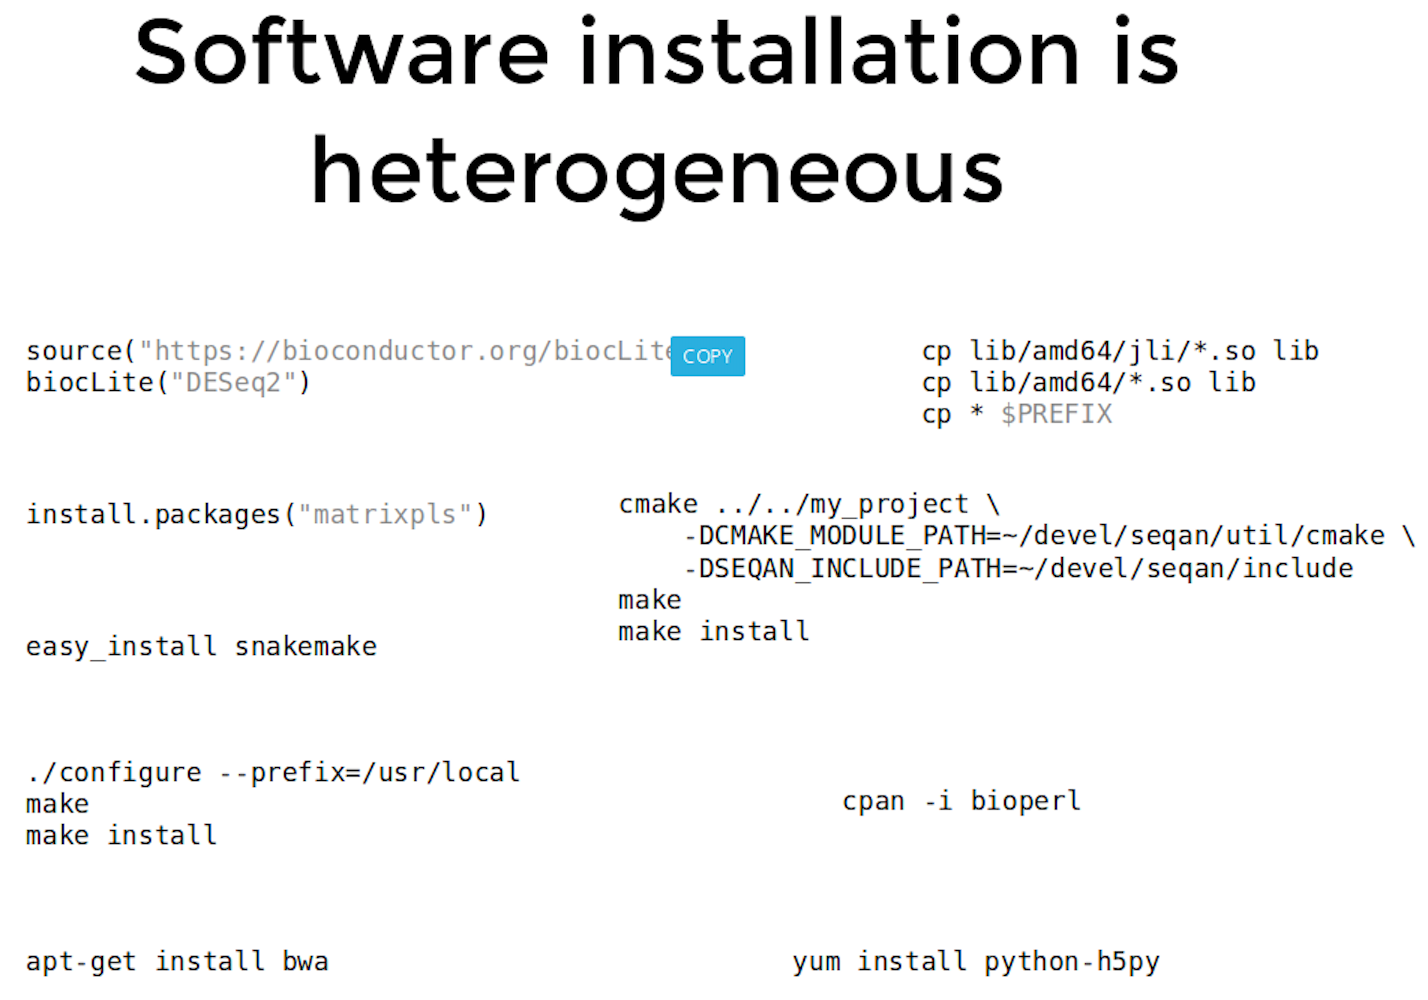
Installing software is hard. Installing scientific software (including all required dependencies of said software!) is often even more challenging.
Installing software system-wide creates complex dependencies between your reearch projects that shouldn’t really exist!
Rather than installing software system-wide, wouldn’t it be great if we could install software separately for each research project?
8.3. What is an environment?
A environment is a directory that contains a specific collection of packages/tools that you have installed. For example, you may have one environment with Python 2.7 and its dependencies, and another environment with Python 3.4 for legacy testing. If you change one environment, your other environments are not affected. You can easily activate or deactivate environments, which is how you switch between them.
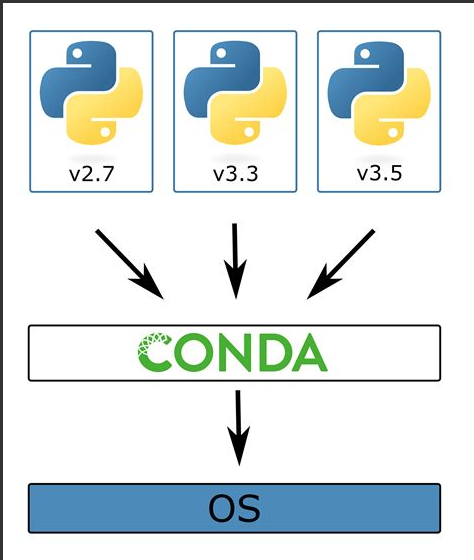
8.4. What is Conda?
Conda is open source package and runs on Windows, Mac OS and Linux.
Conda can quickly install, run, and update packages and their dependencies.
Conda can create, save, load, and switch between project specific software environments on your local computer.

Conda as a package manager helps you find and install packages. If you need a package that requires a different version of Python, you do not need to switch to a different environment manager, because Conda is also an environment manager. With just a few commands, you can set up a totally separate environment to run that different version of Python, while continuing to run your usual version of Python in your normal environment.
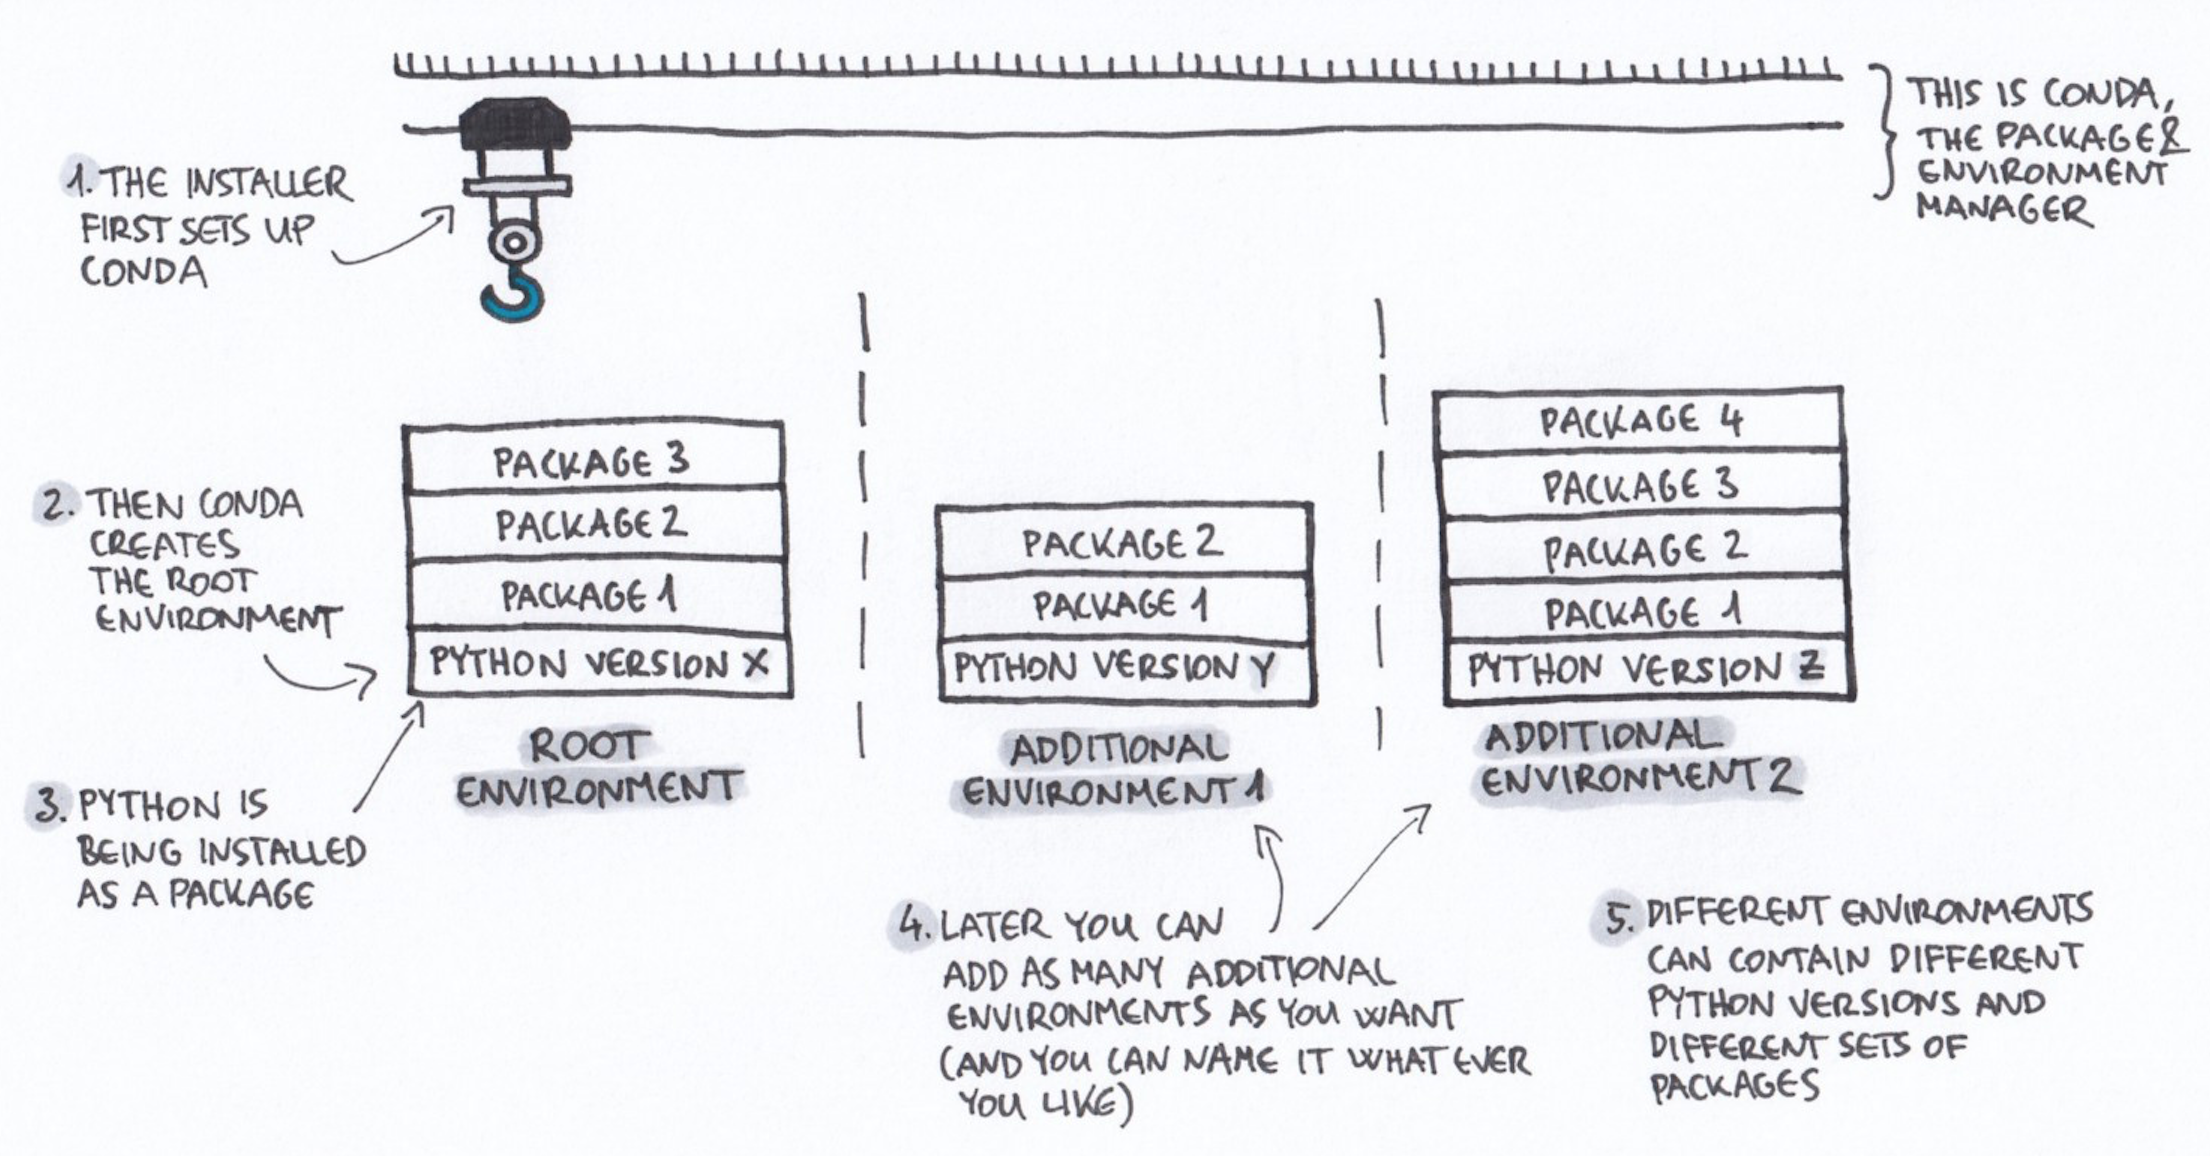
8.5. How does Conda work
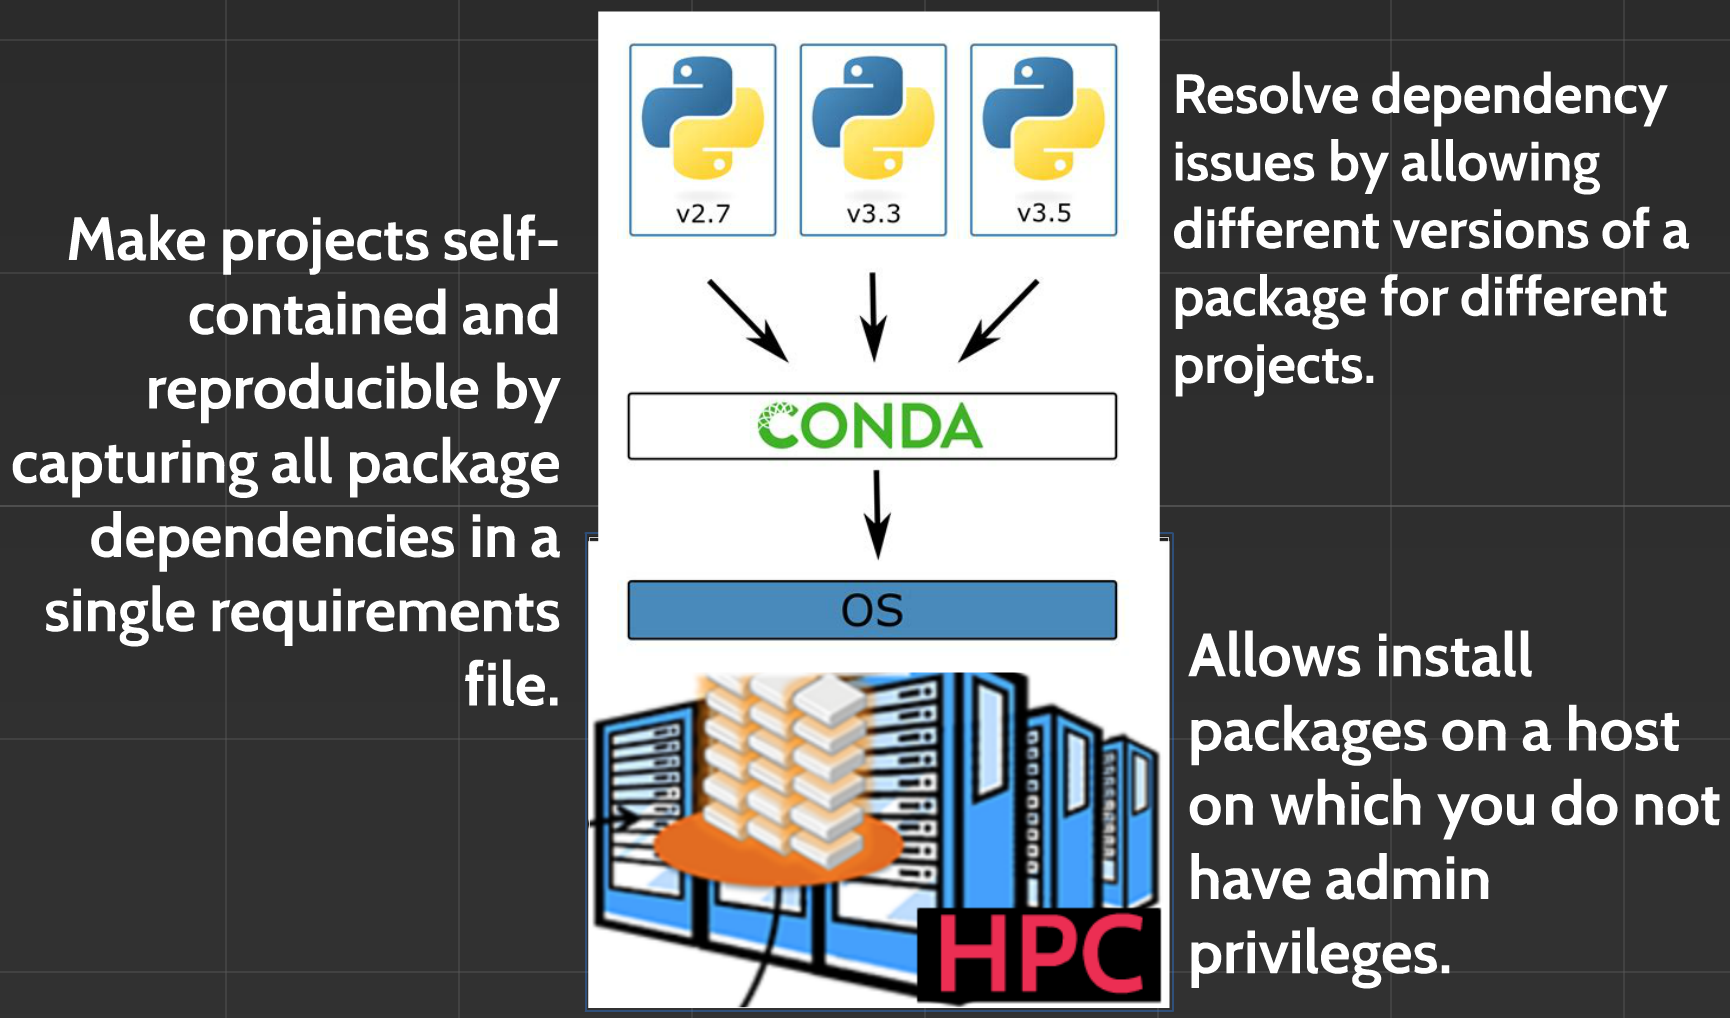
8.6. Benefits of Conda
8.7. Installing & Activating Conda
We have already installed conda on these instances, but please see the stellar conda documentation after the class if you’d like to install it on your personal computer or elsewhere.
8.8. Adding a new environment
If you need to re-access your terminal environment, see here.
Check your current version of python by exectuting python --version
To create a new environment named, for instance mynewenv (you can name it what ever you like), that includes, let’s say, a Python version 3.4., run:
conda create --name mynewenv
8.9. Activating and leaving (deactivating) an environment
Inside a new Conda installation, the root environment is activated by default, so you can use it without activation.
In other cases, if you want to use an environment (for instance manage packages, or run Python scripts inside it) you need to first activate it.
conda activate mynewenv
The command prompt changes upon the environment’s activation, it now contains the active environment’s name.
The directories of the active environment’s executable files are added to the system path (this means that you can now access them more easily). You can leave an environment with this command:
conda deactivate
It needs to be mentioned that upon deactivating an environment, the base environment becomes active automatically.
8.10. What are Conda channels?
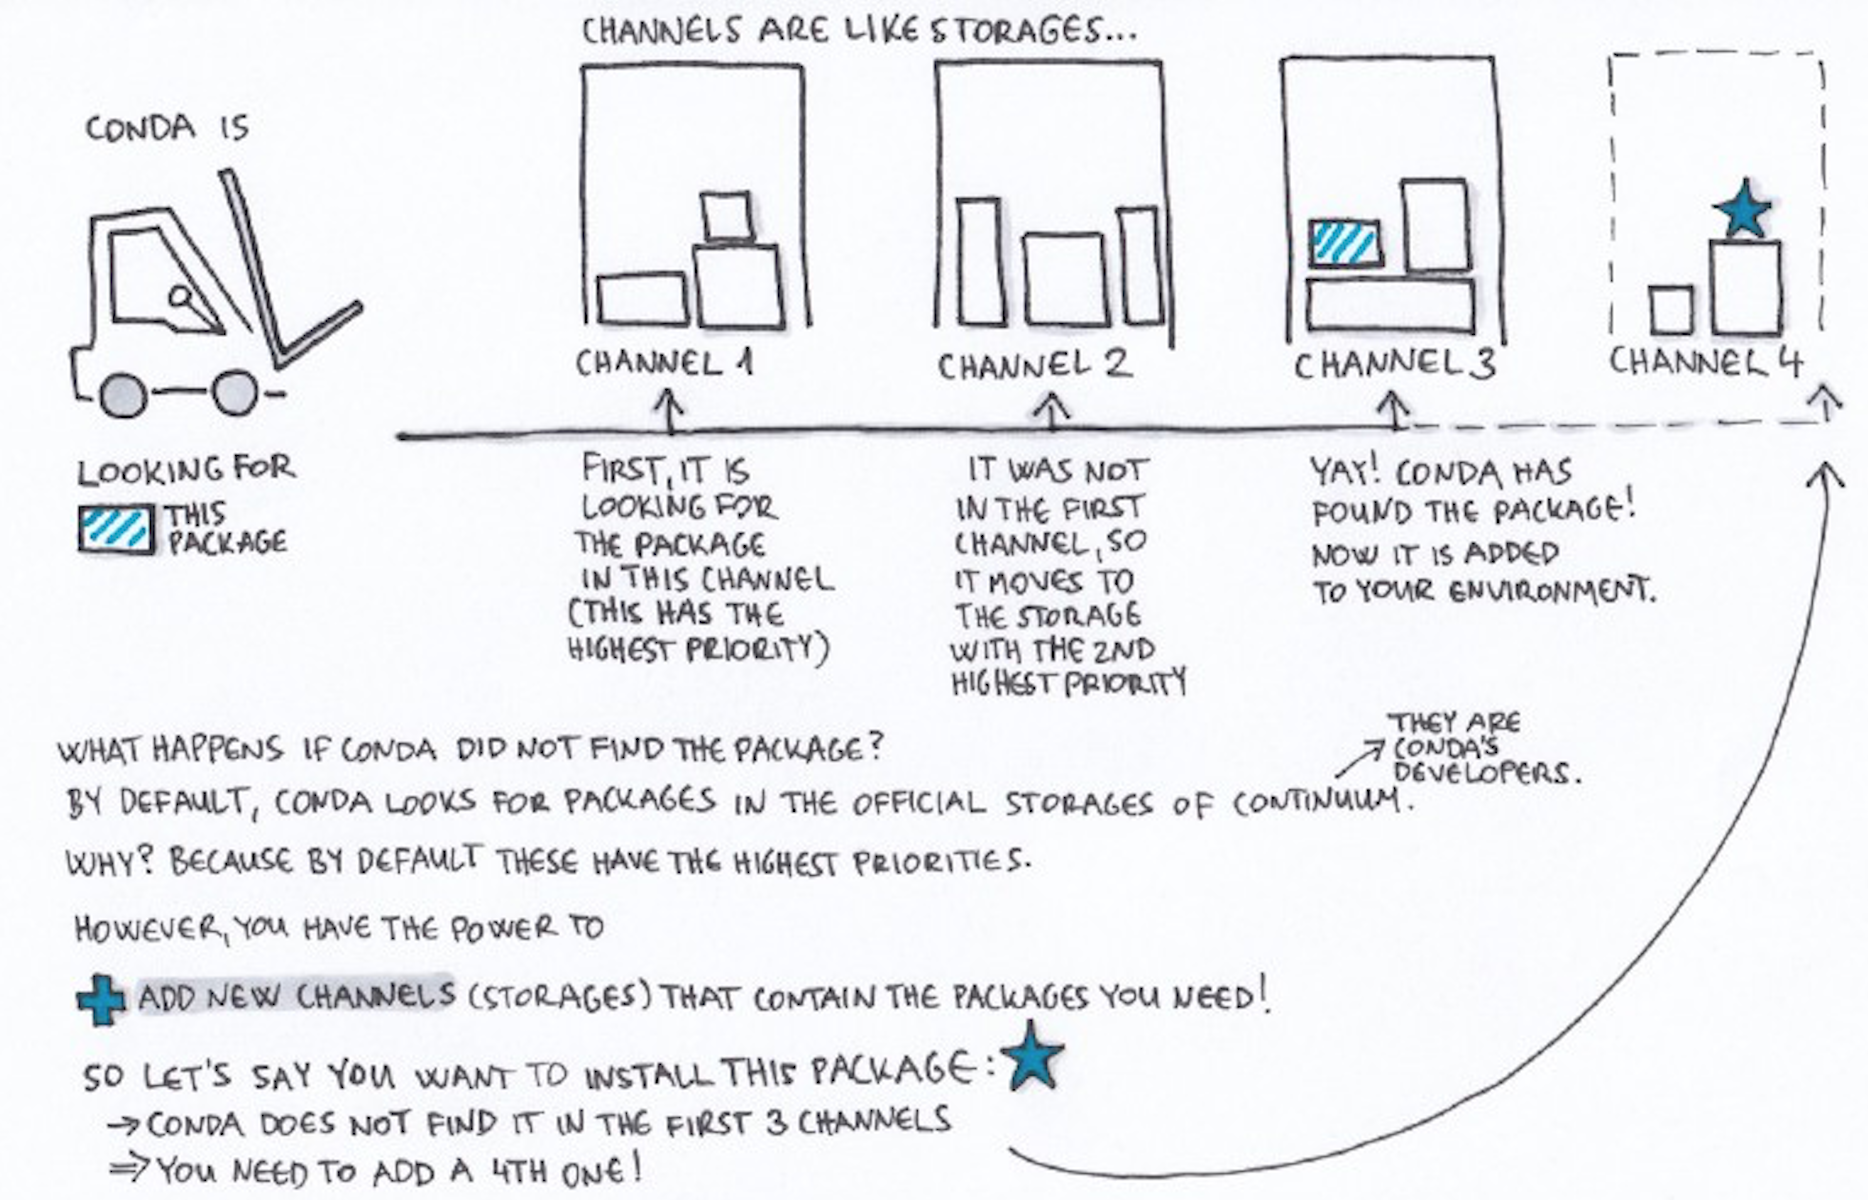
Channels are the locations of the repositories (directories) online containing Conda packages. Upon Conda’s installation, Continuum’s (Conda’s developer) channels are set by default, so without any further modification, these are the locations where your Conda will start searching for packages.
Channels in Conda are ordered. The channel with the highest priority is the first one that Conda checks, looking for the package you asked for. You can change this order, and also add channels to it (and set their priority as well).
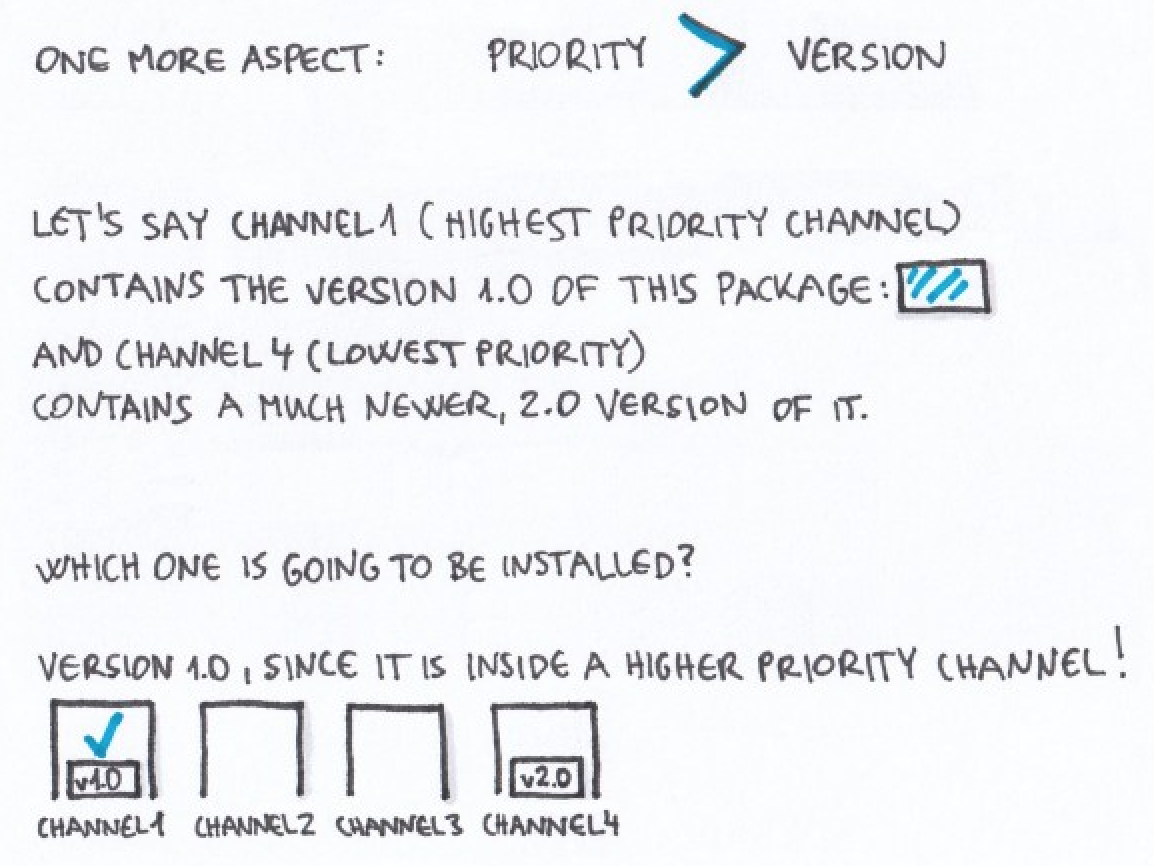
If multiple channels contain a package, and one channel contains a newer version than the other one, the order of the channels’ determines which one of these two versions are going to be installed, even if the higher priority channel contains the older version.
Bioconda Channel
See the bioconda paper and the bioconda web site
Bioconda is a community-enabled repository of 3,000+ bioinformatics packages, installable via the conda package manager. Note: bioconda is not available for windows systems
Add channels
conda config --add channels defaults
conda config --add channels bioconda
conda config --add channels conda-forge
Searching, installing and removing packages
To list out all the installed packages in the currently active environment, run:
conda list
Try running a program pre-installed on this instance:
fastqc
To search for all the available versions of a certain package, you can use the search command. For instance, to list out all the versions of the seaborn package (it is a tool for data visualization), run:
conda search samtools
Similarly to the conda list command, this one results in a list of the matching package names, versions, and channels:
Loading channels: done
# Name                       Version           Build  Channel
samtools                      0.1.12               0  bioconda
samtools                      0.1.12               1  bioconda
samtools                      0.1.12               2  bioconda
""""""""""""""""""""""""""""""""""""""""""""""""""""""""""""""
samtools                         1.9      h91753b0_3  bioconda
samtools                         1.9      h91753b0_4  bioconda
samtools                         1.9      h91753b0_5  bioconda
samtools                         1.9      h91753b0_8  bioconda
To install a package (for samtools) that is inside a channel that is on your channel list, run this command (if you don’t specify which version you want, it’ll automatically install the latest available version from the highest priority channel):
conda install samtools
You can also specify the package’s version:
conda install samtools=1.9
8.10.1. Freezing an environment
This will save the list of conda-installed software you have in a particular
environment to the file packages.txt:
conda list --export > packages.txt
(it will not record the software versions for software not installed by conda.)
conda install --file=packages.txt
will install those packages in your local environment.
8.10.2. Conda Commands
| Conda commands | action |
|---|---|
conda install |
install a package |
conda list |
list installed packages |
conda search |
To search a package |
conda info |
list of information about the environment |
conda list |
list out all the installed packages in the currently active environment |
conda remove |
Remove a conda package |
conda config --get channels |
list out the active channels and their priorities |
conda update |
update all the installed packages |
conda config --remove channels unwanted_channel |
remove unwanted_channel |
conda env list |
list the different environments you have set up |
conda activate myNewEnvironment |
activate the myNewEnvironment Conda environment (this also works for activating our base environment |
conda info --envs |
list the locations of Conda directories |
8.11. A note on the management Conda Environments
Conda environments are expceptionally useful! However, they can become quite large depending on how many packages we load into them. We can check how large any of our Conda enviroments are by finding the path to the environment directory and then estimating the file space usage of that directory.
First, let’s find where we put out mynewenv directory
conda info --envs
This will print out a list of the locations of our Conda environments.
# conda environments:
#
base                  *  /opt/miniconda
mynewenv                 /opt/miniconda/envs/mynewenv
Next, let’s use the command du to estimate the space our mynewenv directory is taking up!
du -sh /opt/miniconda/envs/mynewenv/
We can see our mynewenv environment is taking up about 12K of space.
12K /opt/miniconda/envs/mynewenv/
QUESTION: How much space is your base environment taking up?
8.12. More Reading on Conda
Conda Documentation
Image credits: Gergely Szerovay. Read original article here